
Starting online tuition classes is one of the smartest and most flexible career options because it allows you to earn by sharing your knowledge without needing a big investment or physical setup. With the growth of digital learning, students are actively looking for teachers online which means you can reach learners not just in your city but across the country from your home. It gives you complete control over your schedule, fees and teaching style, making it ideal for students, part time earners or even full-time professionals. It also offers job security because education is always in demand, and once you build trust with students, you can generate a stable and long term income. Overall, online tuition combines low risk, high potential and freedom, making it a very strong career option in today’s digital world.
First you have to choose your subject or skill because it is the most important starting point to decides how confident you’ll feel while teaching and how easily you can attract students. Don’t just pick a subject because it’s popular, choose something you genuinely understand and can explain in a simple way. Think about the topics where people already ask for your help because that’s usually your natural strength. It could be school subjects like Maths or Science or skills like spoken English, coding or even basic computer knowledge. Also, keep in mind that subjects related to exams or practical skills usually have more demand. Starting with one focused subject is always better than trying to teach everything at once because it helps you build trust and a strong reputation faster. These are some important tips for your online tuition classes:
- Choose What You Know Well
- Pick a subject where you have strong understanding
- You should be able to explain concepts easily to beginners
- Confidence in subject give you better teaching quality and student trust
- Pick Something You Enjoy in Teaching
- Interest matters a lot in long-term consistency
- If you enjoy teaching it, you won’t feel bored or tired
- Passion reflects in your teaching style and attracts students
- Focus on One Specific Area
- Don’t try to teach everything at once
- Example: instead of Maths, choose Class 10 Maths
- Specific niche helps you grow faster and build authority
- Check Market Demand
- Choose subjects students are actively searching for
- Exam-related subjects like CBSE, boards, competitive exams are high demand
- Skill-based learning like English speaking, coding is also trending
- Understand Your Target Students
- Decide who you want to teach (school, college, beginners)
- Your teaching style should match your audience
- Helps in better communication and results
- Start Small and Grow
- Begin with one subject or course
- Once you gain experience, expand to more topics
- Growth becomes easier step by step
Top 5 online income source for students in 2026 (for beginners)
Select Teaching Platform
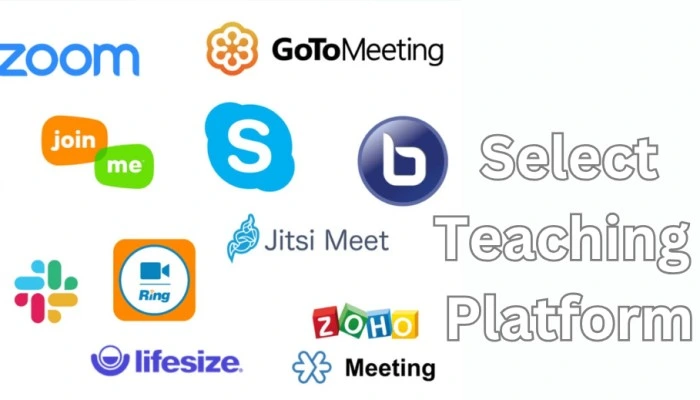
Selecting the right teaching platform is where your classes actually come to life so don’t overcomplicate it pick something simple, reliable and easy for both you and your students. In the beginning, your goal isn’t to build a big system but to start teaching smoothly without technical headaches. Tools like Zoom Video Communications and Google Meet are perfect for live classes because they’re easy to use and work well even on basic internet. If you want to grow and reach more students, you can use YouTube to upload demo or recorded lessons. As you gain experience, you can later move to your own website or paid platforms but at the start, keep it simple and focus on teaching, not tools.
- Choose Easy-to-use Platforms
- Pick a platform that is simple for you and your students
- Avoid complicated tools in the beginning
- Ensure Stable Performance
- Platform should work well on low internet speed
- Avoid frequent lag or disconnection issues
- Smooth classes improve student experience
- Support for Live Classes
- Use Zoom Video Communications or Google Meet for real-time teaching
- Features like screen sharing and recording are important
- Helps in better explanation and interaction
- Option for Recorded Content
- Use YouTube to upload recorded lessons
- Students can rewatch anytime
- Also helps you attract new students
- Student Limit & Control
- Check how many students can join at once
- Look for features like mute and unmute, chat and attendance
- Helps manage class easily
- Cost & Budget
- Start with free platforms and upgrade only when needed
- Avoid unnecessary expenses in the beginning
Setup Basic Equipment

Setting up basic equipment for online tuition is one of those steps where people often overthink things and delay starting online teaching. The truth is, you don’t need a fancy studio or expensive gadgets to begin teaching online in 2026. What really matters is that your students can hear you clearly, see you properly and understand your explanation without distractions. A simple and well planned setup can look professional and work perfectly, even on a small budget. Whether you’re teaching school subjects or skills, your focus should be on clarity, comfort and consistency. As you grow and start earning, you can always upgrade your setup but in the beginning, keeping things simple and effective is the smartest approach.
Essential Equipment You Need to Start
Choose the Right Device
Your device is the backbone of your online teaching setup. You can start with a laptop or even a smartphone if you don’t have a laptop. A laptop is usually better because it allows easy screen sharing, multitasking and smoother class management. However, many beginners successfully start with just a smartphone so don’t let this stop you from getting started.
Focus on Clear Audio Quality
Audio quality is more important than video or camera. If students can’t hear you clearly, they won’t understand anything. You don’t need an expensive microphone basic earphones with a mic work well. Just make sure you sit in a quiet place and avoid background noise like fans, traffic, or people talking.
Use a Stable Internet Connection
A stable internet connection is a must for smooth classes. Slow or unstable internet can interrupt your teaching and frustrate students. Try to use a reliable Wi-Fi-connection or strong mobile data. It’s also a good idea to keep a backup internet option, like a hotspot, in case your main connection fails.
Set Up Your Camera Properly
You can use your laptop’s webcam or your phone’s camera for teaching. The important thing is to keep the camera stable and at eye level so students can see you clearly. Avoid shaky angles or poor positioning, as it can make your class look unprofessional.
Arrange Proper Lighting
Lighting plays a big role in how you appear on camera. Try to sit in a place with good natural light like near a window. If that’s not possible, use a simple light source in front of you. Avoid sitting in a dark room or with strong light behind you as it can make your face unclear.
Choose a Writing Method
If you teach subjects like Maths or Science, you’ll need a way to write and explain concepts. You can use a notebook and show it on camera, a whiteboard or even a digital writing pad if you have one. Start with whatever is easiest for you and upgrade later if needed.
Plan Your Course Content and Fees

Planning your course content and fees is the point where your online tuition starts looking professional instead of random classes. Most beginners make the mistake of starting without a clear plan and then both they and their students feel confused after a few days. If you take a little time to organize what you’ll teach and how much you’ll charge, everything becomes much smoother. Students feel more confident joining you because they know what they’re getting and you feel more confident teaching because you have a clear direction. In 2026, students and parents prefer structured learning, not just daily classes without a plan. At the same time, your fees should be reasonable in the beginning so you can attract students and build trust and then slowly increase as your experience grows.
How to Plan Your Course Content
Start with a Clear Goal
Before teaching anything, decide what your students will achieve. For example will they complete a full syllabus, improve their basics or prepare for exams? When your goal is clear, your teaching becomes more focused and effective.
Break the Course into Small Parts
Instead of teaching randomly, divide your subject into chapters or modules. This makes learning easier for students and also helps you stay organized. A structured course always feels more professional.
Fix a Proper Schedule
Decide how many classes you will take in a week and how long each class will be. Keep your timing consistent so students can build a routine. Regular timing also shows professionalism.
Prepare Notes and Study Material
Give your students something they can revise later. It can be simple notes, PDFs or even recorded classes. This adds value to your course and improves learning.
Include Tests and Doubt Sessions
Teaching alone is not enough students need practice. Take weekly or monthly tests and keep separate time for clearing doubts. This helps students improve and builds trust in your teaching.
How to Decide Your Fees
Understand the Market
Before deciding your price, check what other teachers are charging for similar subjects. This gives you an idea of what students are comfortable paying.
Start with Reasonable Pricing
In the beginning, don’t keep your fees too high. Start with an affordable price so more students are willing to join you. Once you gain experience and results, you can increase it.
Offer a Free Demo Class
A demo class helps students understand your teaching style. It also builds trust and increases your chances of getting more enrollments.
Promote Your Classes and Courses

Promote your classes and courses in every week because its turn your effort into students and income. A lot of people start teaching with good knowledge but struggle to get students simply because no one knows about them. In 2026, just being a good teacher is not enough you also need to make yourself visible. The good part is, you don’t need a big budget to start promotion. With smart use of social media, personal connections and consistent effort, you can easily get your first few students. Think of promotion as simply telling the right people, in the right way that you can help them learn something valuable. Over time, as more people know about your teaching, your classes will grow naturally and become a steady source of income. These are some way that how you can promote your online classes:
- Start with Your Network
The easiest way to begin is by telling people you already know. Share your classes with friends, family and local contacts. Many of your first students will come from here because people trust someone they already know.
- Use WhatsApp Smartly
Create a simple message about your course and share it in WhatsApp groups or status. Don’t spam just clearly explain what you teach, for whom and how to join. Even a small group can bring your first few students.
- Use Social Media Platforms
Platforms like Instagram and Facebook are powerful for promotion. Post regularly about your subject, share tips, short videos or student results. This helps you build trust and attract more students over time..
- Ask for Reviews and Referrals
Once you have a few students, ask them to share feedback or refer their friends. Word-of-mouth promotion is very powerful and brings genuine students.
- Be Consistent with Promotion
Promotion is not a one time task. Keep posting, sharing and reminding people about your classes regularly. Consistency builds visibility and trust.
Take Payments Easily
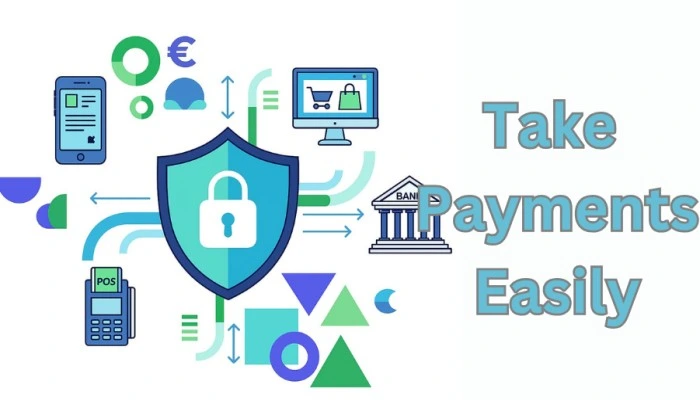
Taking payments should never be a barrier between you and your students. The easier you make it, the more students will join without hesitation. Start with simple methods like UPI and basic apps and once your classes grow, you can move to advanced systems if needed. The focus should always be on convenience, clarity and trust. Many new teachers make the mistake of setting up complicated payment gateways which can confuse students and even reduce enrollments. In reality, most students prefer quick and familiar payment methods. The goal is to make the payment process smooth so that once a student decides to join, nothing slows them down or creates hesitation.
Use UPI for Quick Payments
- UPI is the easiest and most popular option in India
- Share your UPI ID or QR code
- Payments are instant and hassle-free
Accept Bank Transfers
- Share your account number and IFSC code
- Useful for students who prefer direct transfer
- Works well for monthly fees
Use Simple Payment Apps
- Apps like PhonePe, Paytm, or Google Pay are widely used
- Easy for both you and students
- No technical setup required
Avoid Complex Payment Gateways
- No need to use heavy systems in the beginning
- They require setup, verification, and fees
- Start simple and upgrade after sometime
Offer Flexible Options
- Give 2 to 3 payment methods
- Makes it easier for students to pay
- Increases chances of conversion and admissions